Monday, November 19, 2012

Scraped Hardwood Floors 2


This is a picture of the floors before the guys attacked them again this morning. 


When you see how much work goes into hand-scraped hardwood floors, you realize the company  doing the floors deserves every penny they charge.

Last post I ended with the sanded bare floors:


Next came hand scraping one way, and then more scraping the other way. The guys really did do it by hand, on their knees, with tools.


We ended up with four large green trash bags of wood curl shavings for the yard, but that's a future post.

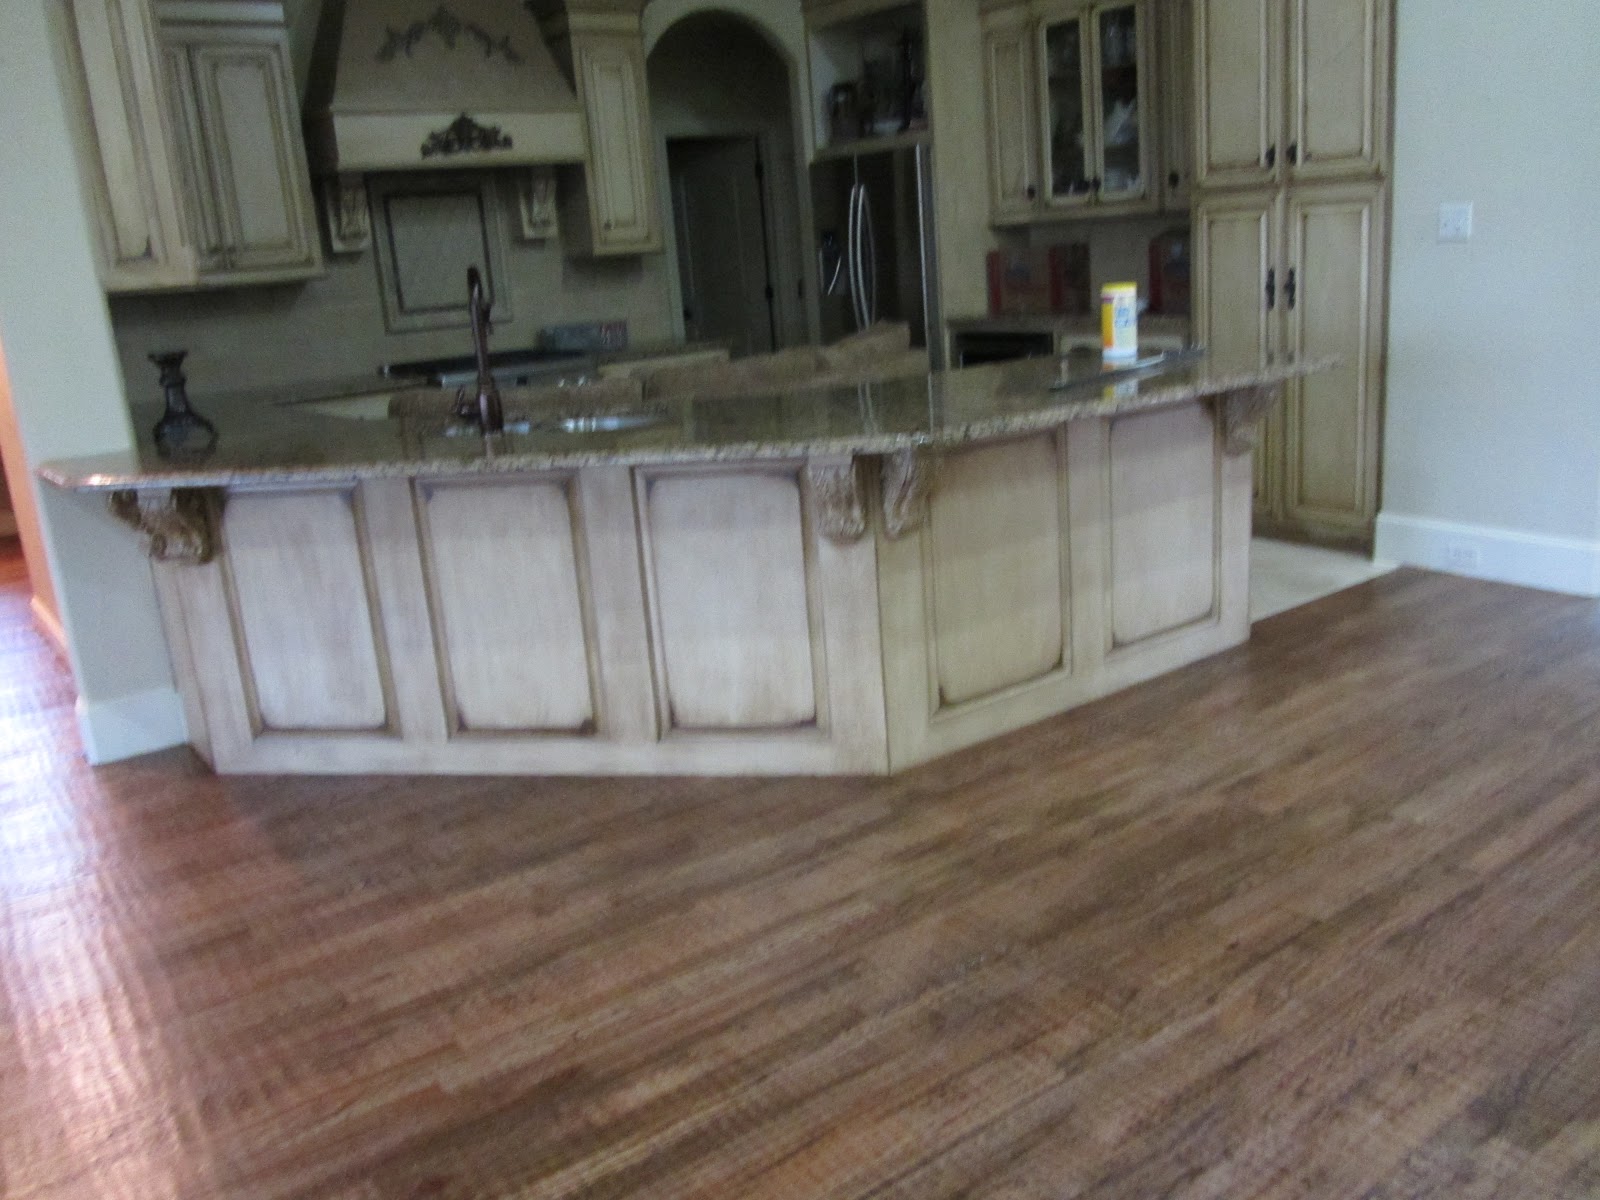
Here's a picture of the floors this morning, before they started on them again today. I actually thought they were finished when they left Saturday night, that's how innocent I was!


To get to this point by Saturday evening, after the hand scraping there was a sanding, then a coat of stain. Next two coats of sealer or something.


So you can see why I kinda thought they were through except for the trim...wrong!

Here's one of the "Mister Evils" back Monday morning to torture what looks to me like lovely floors.

I'm trusting the process because I'm sure they wouldn't be doing all this work if it wasn't necessary.

But it's so hard to see them start sanding again on what looks like perfectly lovely floors!


I hate to ask you to come back again, but I'll have to wait a few days to post the finished version of the floors.

Thanks for stopping by to share the story of our life so far.

Friday, November 16, 2012

Wood Floors


We've finally found floors we both love and can agree on.

Here's what they look like so far on day 3 of  a 5-day process:


We chose to go with hardwood (oak) with heavy hand scraping and a medium dark stain. Last Monday the wood guys brought all the wood and left it in the house so it could get acclimated to the house.


This is the before picture of the ugly stained concrete floors that came with the house:
 

We are so happy with how much bigger the rooms look with the bare wood so far.


Wild Bill would love to just clear coat and seal them and leave the wood showing.

hmmm...You know that isn't what we're doing, right?

Here's a sample of the scraping the wood guys are doing to distress the floors. The stain is the same on both samples, chestnut I think they said:


The left side is lightly hand scraped, the right side is heavier. I'm sure the guys were  disappointed when we chose the heavy scraping on the right! It's twice as much work and they (4 of them) have been down on their knees all afternoon.


This is the stain on the heavy scraping after it had a chance to dry. I can't wait till it's all scraped, stained and sealed.

I hope you'll come back and take a look at the finished floor on Monday when it's done.

I'm joining the party over at the following:

http://frenchcountrycottage.blogspot.com

Sunday, November 11, 2012

Money Tip: Eating Out At Chili's


Wild Bill and I like to eat out, so we try to save money whenever we can. We've developed a knack for finding the best deals at places we like to eat.

We use to spend over $40 when we ate at Chili's. Now we can eat at Chili's for around $20, not including tax or tip.

I left tax and tip out of the comparison because taxes vary and people tip differently. We tend to leave a little extra for the tip when we drink water because the server does just as much work bringing water as ice tea.

Here's what we consider the best deal at Chili's:

A section on Chili's menu is "Two For $20" that includes a choice of an appetizer to share and two meals. Under the Two For $20 menu section, there are a variety of meals and appetizers listed.

Wild Bill and I both love Chili's Spareribs with the Shiner Bock beer sauce. For the side, their Coleslaw is wonderful.


I'm embarrassed to show you our appetizer as we finished the guacamole before I thought about taking pictures to post on this money saving meal!


You'll have to trust me when I say the guacamole was wonderful with corn and fire roasted tomatoes.

Here's a close up of the Coleslaw. It appears they add tomatoes to it too. Whatever was in it, it was good!


For the most part, we've switched to drinking water in restaurants. I'm trying to cut my sugar intake and increase my water drinking as much as possible. The side benefit is it reduces the cost too as, you know, water is always free unless it's bottled.

I'm not getting paid for this post. Chili's has no idea who I am. All words come from me -- and I think I just talked myself into lunch at Chili's today!  

Happy Sunday wherever you are.

Tuesday, November 6, 2012

Sometimes You Get The Bear, Sometimes The Bear Gets You


I voted. Not well. But I voted at the crack of dawn. Or 7:03 a.m. However you choose to describe it.


I was all prepared as usual. I had my voter card and driver's license in my hand and proudly let them scan my driver's license to automate the process. It went quick...

Not Wild Bill though. He showed his driver's license, but insisted they not scan it. Something about not wanting them to put him on mailing lists...huh? 

For the 1 minute they gained with me, they lost 5 with him.

I'm wondering... if they key it in the old fashion way, how does that protect you from conspiracies?

But, oh well, I'm prepared. It's a good day.

So I walk on to some friendly women who wanted to lead me to a booth. But, ah...um... I sat down for Wild Bill to go first. One look at me and he knows instantly what's up and plunges right past me as I sit down and tell the nice ladies I'll wait for my husband to finish before I go.

I feel like the bear got me today.


One perplexed voting official lady asks "...do you need assistance with voting? Do you need your husband to help you vote?"

I hate to answer because, I'm all prepared ya know. Finally I confess:

"No, I need my husband's reading glasses. My three pair and ten spare are all left at home."

And she lends me her reading glasses. I don't have to wait for Wild Bill to finish first. It's a good day. Hope you got through the process as easy as we did.

November 6, 2012. It's a good day to vote!

Just don't forget your glasses.


Saturday, November 3, 2012

Recipes Get A Rating


Note: Before I posted this, I called my middle daughter and asked if she would be offended by the rating scale I'm proposing. She laughed and said she had actually been wondering "...just how easy..." the last recipe really was. So she approved my new rating system -- and this post.


With that said, I've decided I need to give the recipes I try a rating. Since my cooking skills are lacking, I like easy recipes.

My rating system will note the ease of the recipe by using pictures:

This is Jaysa:


The only one I know with cooking skills worse than mine is my middle daughter Jaysa.

As I've written before, Jaysa actually burned "Cup of Noodles" in the microwave (yes, she was about 9, but still) because she skipped the only step of adding water to the cup before microwaving!

According to her husband she hasn't improved much since then, so he does all the cooking.

A "One Jaysa" will indicate Jaysa could successfully cook it.


A "Two Jaysa" will indicate she might be able to successfully cook it.


A "Three Jaysa" will indicate there's a high probably she could not cook it.


A "Four Jaysa" will indicate there's no possible way she could pull this recipe off!


The recipe for Easy Banana Bread in the previous post is a One Jaysa.


So... if you have a 9-year-old and three ripe bananas... let him or her have at that stove tonight!

P.S.
Everyone excels in their own area of expertise. Besides being a great mother to Little Ben, Jaysa is highly technically skilled.

I'm sure she is shocked that I was able to use PicMonkey to do a collage.

I guarantee no computers were injured making this post!


Thursday, November 1, 2012

Tea And Banana Bread


We had a tiring day today and decided to relax with a cup of tea. I remembered a recipe for banana bread that I had jotted down (from a website I'm sure) and decided to try it.


The scribbled recipe I had was dated October 13th, so I tried to find it on several blogs by using that date. I thought for sure it would be from StoneGable's blog as that's my go-to for recipes, but I couldn't find it there.

If you see this post and it's your recipe, let me know and I'll give you the credit you deserve! The recipe was simple. All you need is a mixer and a few measuring utensils.


It really lived up to its name: Easy Banana Bread


I made the tea with the English style electric kettle I love to use. Its simple to use too. Just fill it up, put it on the black pad, and push the button. It turns itself off when the water is hot.

A tip from an English couple a long time ago was to hold the pot high up and aerate the water, it makes the tea taste better. Really!


Here's the recipe. It's super easy. I wish I could give proper credit to the original source! When I copy a recipe now, I also note the website so I will be able to link it.

Set oven for 350 degrees, grease and flour loaf pan, bake about 45 mins.

1. Mash 3 bananas in mixer
2. Add 2 eggs and mix
3. Mix in 3/4 cup of sugar
4. Mix together and slowly add to mixer:

     2 cups flour
     1 tsp salt
     1 tsp baking soda

5. Don't over mix


Easy seems to be my theme tonight. Here's the link to StoneGable's blog, in case you want to view some excellent recipes.

http://www.stonegableblog.com

Sunday, October 28, 2012

Money Saving and Traveling


I like to find new blogs by bloghopping, therefore, I have no idea how I found these two interesting and informative blogs.

The first has great ideas on how to make and save money. The other is written by a young (almost) mother who gave up most of her personal belongings to travel full time with her husband. They plan to see the U.S. and Canada and have a pretty good start on that.

Hope you'll take a minute to check them out...

http://moneysavingmom.com

http://travelingphoblogwripher.blogspot.com


Wednesday, October 24, 2012

Island Fever


This isn't a post about a much needed vacation on a luxury island. Turn away now unless you're obsessed with getting rid of kitchen clutter.

My original idea was to put the usual "counter stuff" on an island so the kitchen wouldn't be so messy. Well, the island got too messy.

What to do?


I couldn't put pots and pans on the pot rack portion because it just added to the visual clutter, so I use it for holding cups.


Then the question was, where to put the pots and pans?

They ended up on the shelf below, which was way too much clutter!

So I cleared it off...


And then the journey to find some sturdy, large (perferably cute) baskets began.

Pottery barn, too expensive...
World Market, too expensive...
   
                  Finally - Target - perfect!


I'm proud to say for once, before I went shopping,  I measured the space and determined the number and size baskets I needed: 
  • one for small pots and pans
  •  one for the blender and food processor 
  •  one for bowls and strainers


Perfect...I couldn't be happier about the baskets. Don't they fit perfect? Aren't the little chalkboards darling? ...but... now... I'm thinking the top of the island  is too messy and the kitchen counter-tops are too bare.

I'm sharing at the following blog parties this week:

http://frenchcountrycottage.blogspot.com
http://thebrambleberrycottage.blogspot.com
http://blissfulrhythm.blogspot.com


Tuesday, October 23, 2012

Fluffing The Nest

Wild Bill and I went shopping today and I ran across a vintage scale. I've been wanting one for quite some time.


Yeah, it's pretty grody. Looks like someone will be cleaning it up tonight.

I also bought some Annie Sloan Chalk Paint when I saw some furniture painted with one of the newer colors "Cocoa".


I have to admit, I was smitten at first glance. I cracked that can open as soon as we got home! You see, I've had the china cabinet sitting in the middle of the breakfast room while I'm trying to decide which way to go. I painted the top section of the cabinet with a homemade version of chalk paint. I made it using non-sanded grout and a gray paint color by Martha Stewart. I think it was Bedford Gray.


Previously, I had painted the bottom of the china cabinet with my homemade version of "Old White" chalk paint. And then the top and the bottom both sat there since neither of them was what I wanted.  And they sat and sat ... in the middle of the mess ... while I couldn't decide.


Am I the only one who has so much trouble with picking colors? Do you have any suggestions for me? How do you decide?

Hmmmm...I think I got sidetracked

Back to Cocoa. I'm already doing the shelves. My plan is to do the top and bottom in Cocoa and then use a dark wax to age it. And maybe trim it a little in old white. I'm on this. Really. I might get something completed soon.