Sunday, July 30, 2017

Christmas-In-July Reindeer Sign


I'm sure you've all been breathlessly waiting to see if I really did complete that Christmas Sign I said I was going to make at a Christmas In July chalk paint class. Well my friends, wait no more!
The big treat for me was that when I sent a text, with pictures of the sign, to my three and a half daughters (half is Gina, who has been Oldest Daughter's closest friend since 1st or 2nd grade) the girls all loved it and wanted one. Shocker! Usually my projects are met with less than enthusiasm from the Peanut Gallery!

Now, there are some problems with red paint bleeding, but I will be fixing that soon with some sandpaper and distressing. 

The class only lasted 2 hours. Normally, between the white base coat and the red stencil coat, there would've been some sealer applied. 

The sealer would've kept the red paint from bleeding into the white. We didn't have time for a sealing coat to dry, so we had to skip that part of the process. 

The class was great fun with snacks and drinks and lots of joking. I've really missed being around groups of women since Wild Bill retired 5 years ago. When you're both retired, you tend to run in couples, not packs. 

If you live in Northeast Texas area, I highly recommend you check out 2 Chicks And Some Paint in Denison Texas. 


They've changed their name to -- 2 Chicks Home And Market -- to better fit with the direction their shop is going. I'll show you why in a future post. Right now I just want to brag about finally getting a project done!


The next day after the paint had a chance to dry more, I added some clear and dark wax, and roughed it up a little.

Sometimes my "More Is Better" philosophy causes me to overdo. I'm at the point where the dark wax on the sign makes it look like a reindeer revolt trampled over it!

So I guess finished...but not finished. I'll be using more sandpaper and elbow grease to see if I can take some of the dark wax off a little, to make it look a little less dirty. Always something!


Thanks for dropping by!


Friday, July 28, 2017

Convoluted Math And Teacups


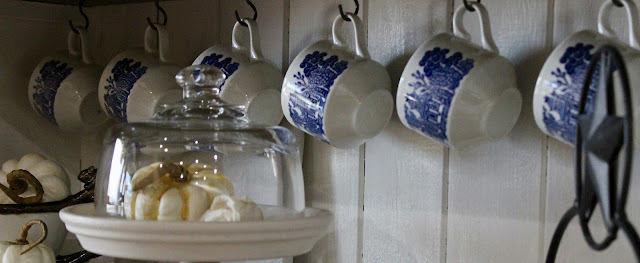
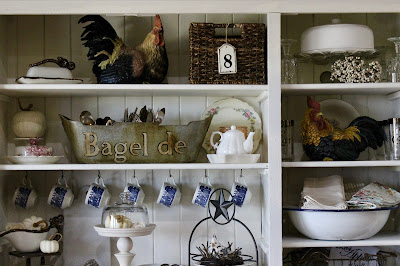
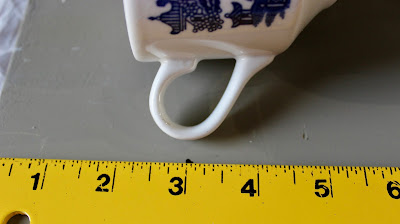
Joining Bernideen for her Garden Tea Party. Although I don't have a pretty tea set up to share, I do think ladies with teacups might also want to hang them!

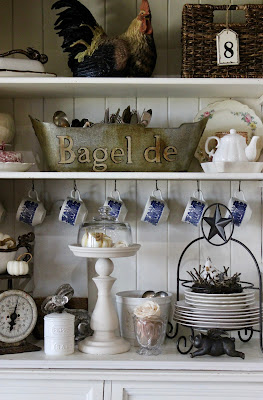
Would you believe it took me forever just to hang a few teacups on a board? Yep, afraid so.
See how evenly spaced my little cups are? Apparently I don't have the gene that allows me to quickly figure out how to measure and screw 7 cup hooks into 36 inches of board.
I'll bet there are some of you who already did the math in your head and are dying to tell me how to do it...My husband is at the head of that line!
But sometimes a girl just wants to figure it out herself! Even if she has to take a rather complicated route to get there.

I didn't even say a word to the Clark Kent in the next room. I didn't want him to turn into Superman and solve my delimia for me. I just wanted to figure it out myself.

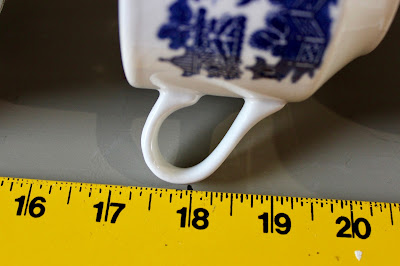
The board was exactly 36 inches. Half of 36 = 18 inches. That should be the middle of the board right? Good So Far.


Now, here's where I think 18 inches on one side...18 inches on the other side. Divide by 3 cups on each side of the center cup. 

Let's see... Divide 18 inches by 3 cups = 6 inches between each cup!  Uhh, Nope. 

That puts cup number 1 at 6 inches and cup number 3 at 18 inches. The center cup (cup number 4) is already at the 18 inch spot. Scratch head. Start again!


Then I realized I needed the end cups to start a little inside the end of the board. 

I set the first cup at 3 inches and subtracted 3 inches from 18 inches = 15 inches. 

So, there's 15 inches between the first cup and the fourth cup, which is sitting at 18 inches. 

Divide the 3 cups into 15 inches = 5 inches between each cup.  Finally I just laid the cups out at 5 inch intervals and eyeballed it!

I was exhausted at this point from the mental exertion of it all. I really think "Girl Math" must be much harder than regular math.


On an accomplishment high, I started screwing the cup hooks into the places I'd marked.

I got three cup hooks screwed in before I had to admit that -- even though I was now a mathematical genius -- I wasn't strong enough to twist all those cup hooks into that hard board. This is where I called Superman. 

He flew in, gave the situation a steely glance...went to the garage and returned with his drill and drill bit. 

Apparently starting the hole with a drill bit makes screwing in cup hooks a whole lot easier, even for Superman.

Now, I'm open to learning how I could've figured this out easier and quicker. Anyone have a better way? Leave me a message, I'm all ears.

I'm joining Bernideen's Tea Related Blog Party today. I hope you'll join me there.  

As far as 5-On-Friday, since there's 7 tea cups in this post, I'll bet you're thinking, "There she goes with that funny math again!"  

But no...the party rules say you can also do 5 minutes on one subject. Who knew I could do 5 minutes on hanging teacups.


Thanks for dropping by!


Come Join The Party:
Tea Related Blog Party at Bernideen's
Sundays Link Party at Finding Silver Pennies
Willy-Nilly-Friday at Around Roanoke
5-On-Friday at the F.A.S.T. with Tricky


Wednesday, July 26, 2017

Wed Wander: Rocky Road And Me


My dad was big on stopping in different small towns, and getting out and walking around, when we were on car trips (usually headed to a campground) in the mid-50's and 60's.

With four kids, one or two dogs, and a whole lotta camping gear piled in a station wagon, we really needed a stop! 
Being the youngest of the four kids, I always got stuck in the middle of the backseat. 

In fact, I think "the middle" is always the lot in life of the youngest child! That's me, in the middle of course, in both the photos above.

There was no such thing as a seatbelt back then either, so if someone went to sleep there was little to keep them from falling over on top of you!

When fights would break out in the backseat, we would stop in a town and get out to "stretch our legs" as Dad would say. 

We walked around, in whatever little downtown we stopped in, until we found an ice cream counter. Before Baskin-Robbins, even the smallest town had at least one soda shop with an ice cream counter back then.

Dad and I always got the same thing -- a double-decker ice cream cone with rocky road on the bottom and orange or rainbow sherbet on top! 

Now that may sound like an odd combo to you, but just try it sometime. It's still my favorite combo...

And when it came to candy bars back then, the Rocky Road candy bar was always my first choice.


So when I saw this recipe on the blog, Simply Stacie, I thought if I made her recipe and mixed in some slivered almonds or cashews, I could make my own Rocky Road candy.


And it's so easy! Simply Stacie's easy-to-follow recipes are always a hit around our house, and I think you'll like them too. You can check out Stacie's Confetti Chocolate Bars and other recipes here.


Thanks for dropping by!


Monday, July 24, 2017

Faded Roses Preserved Forever


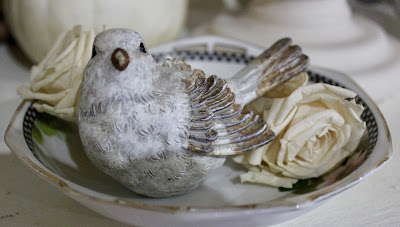
These roses were alive at one time, but have been preserved somehow...How? I have no idea!
I don't have a clue how they preserved them, but I do love them. They come in handy when I need something to pretty up a random space.

There's only one place nearby that sells the roses. Every time I visit the little town of McKinney Texas, I try to stop by a shop called My Favorite Room and buy one or two of the roses. 

 The excuse to stop by the shop gives me a chance to look around and take in all the inspiration there! Everything is painted in creamy shades or gray or white. I love it all!
My Favorite Room carries a large collection of antique and vintage cupboards and chandeliers, and also a lot of upscale furnishings.

All the antiques and vintage pieces are way out of my budget, but I love to soak in the sight of the old furniture pieces inside the store -- and the wonderful plants blooming outside!


Here's a few more of the roses (from My Favorite Room) sprinkled around the cabinet in the breakfast room. 


This one lives in an old glass creamer passed down from Wild Bill's family...
Here's one sharing a gravy boat with a mini faux pumpkin. The little pumpkins are one of my obsessions too!
I'll leave you with this last picture of one of the roses. This one sits in a bird's nest in the kitchen on top of the cup rack. 


Thanks for dropping by!


Friday, July 21, 2017

The Sheep Picture Finds A Home


After tearing the house apart to do some small renovations, we're starting to get it back together. 

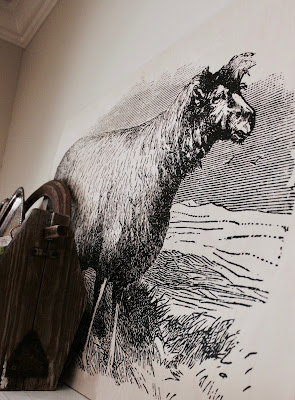
The breakfast room got an old cabinet, which finally provided a home for this large sheep print. 
We bought the print years ago. It's so heavy it just couldn't find a proper home until now.
The cabinet is solid and sturdy and can easily hold the sheep picture, which is printed on a very heavy piece of wood. 

I just leaned it against the wall, and just in case, I drilled two screws into the top of the cabinet in front of the picture to keep it from sliding.

I fell in love with the sheep-print-on-wood when I saw one on French Country Cottage's blog years ago! I ordered one right away (on the internet) and loved it when it arrived, but I wasn't expecting it to be so heavy. Beware of love at first sight!

As for the cabinet, it has been painted many colors in the past 14 years and is still in "progress" of its latest makeover. Among other things, I'm thinking of adding another layer or two of crown molding to the top.
We're still working on the paint for the newly installed cabinet in the dining room, so a lot of clutter found a temporary home in this cabinet. Once the other cabinet gets painted, this cabinet will hold mainly dishes, linens, teacups, etc.
Too many projects going on at one time, that's for sure! It seems one thing we do leads to another, just like those little Chinese puzzles we use to have as kids. To work the little puzzle, you would slide one up and then slide another one over...and on and on.


Thanks for dropping by!

Join Me Here:
Make It Pretty Monday at The Dedicated House
Foodie Friday And Everything Else 
Feathered Nest Friday at French Country Cottage

Tuesday, July 18, 2017

Talkin' Corbels And Paint


I just had to bring up the subject of corbels and paint after I saw a picture on Facebook of this entry bench sold by a local shop in Denison Texas. 

The shop, 2 Chicks And Some Paint, is located in the downtown area of Denison.

Sadly, it sold before I saw it on 2 Chicks And Some Paint's Facebook page. I was at their shop on Saturday, and they do have a lot more lovely things for sale should you ever be in the downtown Denison area. 

Here's a close up of the corbels on the top of the bench. Be still my vintage heart!
After the bench sold, the shop added a personalized welcome sign to the top of the piece. That just made it better, didn't it? 

I'm scheduled for a painting class at their shop this Thursday. Can't wait to learn more about how to apply and use the paint and aging finishes they sell, a brand called CeCe Caldwell. If you're interested in learning about their paint brand, click CeCe Caldwell

I've used CeCe Caldwell's paint and finishes a few times in the past, but I've learned the hard way that each paint line has its own peculiar application needs and processes. 

For that reason, I've decided to take more classes with different paint retailers and learn what I should be doing as opposed to what I have been doing. I have a feeling there will be a vast difference in those two!

As always, my opinions are all my own. No one has compensated me for my opinions.


Thanks for dropping by!